Summary
i-net Clear Reports comes with a Java report viewer which can be shown as an applet, embedded into your own massive applications, or simply placed in a simple small standalone application.
This guide is written to show in a down-to-earth, practical way how simple it is to use the Viewer's API to custom-fit the viewer to your specific needs. We will provide a number of short and concise examples extending from building a standard, simple standalone viewer to how to customize the viewer's tool bar, for example by changing the default behavior of the "info" button, to implementing your own bookmark frame to jump to specific pages of the report and to print on the server side using the viewer's API.
Getting Started
A quick overview of the Viewer API
Here is a quick look at the various most important classes and interfaces in the viewer, and what their function and role is.
SwingReportViewer
The SwingReportViewer is the topmost level of the viewer. It extends from JPanel, so it can be embedded into your own application components. SwingReportViewer has methods to add, create, and remove individual report views, and provides a hub for the viewer's actions and tool bar. It also is the place to provide various global settings for the viewer, for example the default export location, whether to ever show report group trees or the status bar.
To create a SwingReportViewer, simply use the default constructor:
SwingReportViewer viewer = new SwingReportViewer();
RenderData
The RenderData interface composes the interface between the viewer and the report data required for displaying a report.
Usually you will not be calling any of these methods, rather the viewer will call them when it needs to request data. There are various implementations of this interface already included with i-net Clear Reports for you to use, or you could implement your own RenderData to fit your specific solution.
The interfaces included with i-net Clear Reports are URLRenderData (for connecting via HTTP), EngineRenderData (for creating engines to render data when necessary), and CacheRenderData (for using i-net Clear Reports Cache object to retrieve report data).
SwingReportView
SwingReportViews represent individual reports or subreports. Swing ReprotView extends from JPanel, so a view can be extracted from the Viewer and placed in your own components. SwingReportViews cannot be created with a constructor, you have to use a SwingReportViewer to create report views, passing an instance of a RenderData object. To do this, you can either call
ReportView reportView = viewer.addNewReportView(data);
to create a report view and automatically add it to the Viewer's tabbed pane as a tab, or you could call
ReportView reportView = viewer.createReportView(data);
which creates an individual report view without adding it to the viewer.
SwingReportView offers methods for navigating, printing, exporting, and customizing the status bar and navigation view, as well as retrieving settings and information about the report view.
ViewerContext
A ViewerContext can be passed to the SwingReportViewer which will then use it to handle printing, exporting, showing errors, and showing the info dialog. The default implementation of ViewerContext is SwingViewerContext. You may extend from this class if you just wish to change part of the behavior of the Viewer. One simple way to customize the viewer is to create your own implementation of ViewerContext and pass it to the viewer:
viewer.setViewerContext(new SwingViewerContext(viewer) {
    public void print(ReportView reportView) {
        // Your own printing implementation comes here...
    }
});
General Requirements
In order for the following examples to work, the following requirements must be met:
-
Java SE 6 or higher
-
i-net Clear Reports
-
ReportViewer.jar (included in reporting.zip) must be included in your classpath
-
If the example includes an i-net Clear Reports server backend (such as a com.inet.report.EngineRenderData object or any other class in the com.inet.report package), the following requirements must also be met.
-
reporting.jar must be included in your classpath, as well as all other .jar files located in your i-net Clear Reports installation directory.
-
All drivers you are going to use must be included in the classpath.
-
Any Java Beans you are planning on using must be included in the classpath.
-
-
For the report locations to be correct, either copy the sample reports into the i-net Clear Reports directory, or change the report location to point to the report you wish to render.
Creating a Standalone Viewer
Problem
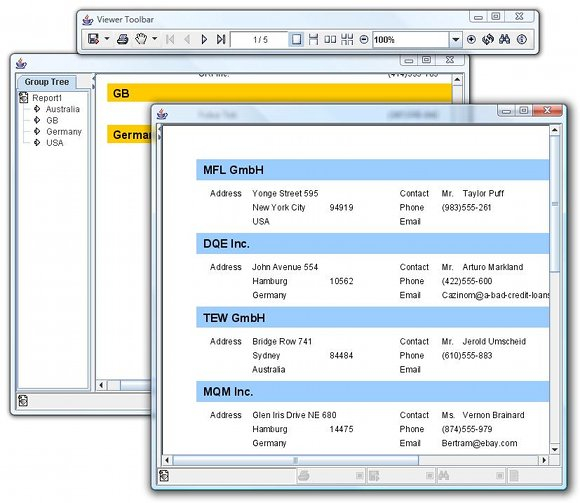
We'd like a Viewer to connect to our report server, running on host myhost on port 9000, and display the report called "sample.rpt".
Solution
import javax.swing.JFrame;
import com.inet.viewer.SwingReportViewer;
import com.inet.viewer.URLRenderData;
public class ViewerStart {

    private JFrame frame = new JFrame(
                      "i-net Clear Reports Report Viewer");
    private SwingReportViewer viewer;

    public  void initGUI() {
        frame.setDefaultCloseOperation(JFrame.EXIT_ON_CLOSE);
        URLRenderData myConnection = new
          URLRenderData(
             "http://myhost:9000/?report=file:sample.rpt" );
        viewer = new SwingReportViewer();
        viewer.addNewReportView(myConnection);
        frame.getContentPane().add(viewer);

        // Display the window.
        frame.pack();
        frame.setVisible(true);
    }
    public static void main(String[] args) {
        new ViewerStart().initGUI();
    }
}
Notes
-
The viewer is just a JPanel which can be placed any Swing component we choose, so you could just as well place it in your own application rather than in a standalone JFrame.
-
This will use HTTP to connect to the report server. If you'd rather render reports locally on the same machine, see the next example.
Creating a Viewer With Locale Report Rendering
Problem
We'd like to have a report renderer and viewer in one application. In other words, we'd like our application to render report templates and then show them in a Viewer.
Solution
All we have to do is replace our URLRenderData object from the above example with the following lines:
// ...
EngineRenderData myConnection = new EngineRenderData( "" );
myConnection.setReportProperty("report","sample.rpt");
// ...
Notes
-
This only works if we already have report templates which we simply would like to view
-
We could set any other report properties as well, such as prompts and other options. For a list of possible report properties, see the i-net Clear Reports documentation.
-
If we'd want to customize the reports via API calls, this would not work, since we'd need a com.inet.report.Engine object in order to change the report. See sample.rdc.EngineRDCRenderData as well as the sample.rdc samples on how to do this.
Viewing multiple Reports
Problem
We'd like to display two different reports in two tabs in the same viewer.
Solution
// ...
URLRenderData myConnection = new URLRenderData(
 "http://localhost:9000/?report=file:sample.rpt" );
URLRenderData myConnection2 = new URLRenderData(
 "http://localhost:9000/?report=file:rdc/complex.rpt" );
viewer.addNewReportView(myConnection);
viewer.addNewReportView(myConnection2);
// ...
Notes
-
Of course, instead of using URLRenderData we can use any other RenderData source.
-
The other way to create ReportViews is by using the method createReportView. In this way, you could show different reports in different frames rather than tabs which is the default implementation. See Showing Reports in Individual Windows on how to do this.
Customizing Your Viewer
Customizing Error Handling
Problem
In addition to the default behavior of the Viewer in the case of an error, an error dialog with more information about the error should popup. Furthermore you'd also like to log the error with your own log handler from your application.
Solution
        // code for creating the viewer ...

        viewer.setViewerContext(new MyViewerContext(viewer));

        // further code ...
    }
}
class MyViewerContext extends SwingViewerContext {
    public MyViewerContext( SwingReportViewer viewer ) {
        super( viewer );
    }

    public void showError( Throwable e, Object source ) {
        // log the error with my own log handler
        MyLogger.log(e, source);
        // shows the dialog
        super.showError( e, source );
    }
}
Notes
-
SwingViewerContext is the Viewer's default implementation of the interface ViewerContext. The ViewerContext is used to handle exporting, printing, showing errors, and showing the info dialog.
-
If you only want to log the error and not show a dialog in the case of an error, you could of course simply omit the call to the super implementation.
Customizing the Info Dialog
Problem
Instead of the default behavior of the Viewer when the info button is pressed, which is showing an info dialog with information about the Java VM, i-net Clear Reports version, etc., you'd like to show your own info dialog.
Solution
        // code for creating the viewer ...

        viewer.setViewerContext(new MyViewerContext(viewer));

        // further code ...
    }
}
class MyViewerContext extends SwingViewerContext {
    public void showInfo() {
        JOptionPane.showMessageDialog( null, "MyReportViewer brought to you by <your company>." );
    }
}
Notes
-
Naturally this solution could be combined with the solution for chapter "Customizing Error Handling" by simply adding a method to your MyViewerContext class.
-
If you'd rather like to remove the info button and action completely, see chapter "Removing Buttons From the Tool Bar" for an example of how to do this.
Customizing the Status Bar
Extracting the Status Bar
Problem
You'd like to take the Viewer's status bar out of the Viewer's panel, and place it in a component of your own application instead.
Solution
// ...
ReportView reportView = viewer.addNewReportView( myConnection );
StatusBar statusBar = reportView.extractStatusBar();
myApplicationComponent.add(statusBar.getComponent());
// ...
Notes
-
StatusBar is only an interface, not a Component, so you must call getComponent() in order to get the representative component of the status bar so that you can add it to your own application.
-
If all you want is simply to remove the status bar, calling extractStatusBar is enough, naturally you don't really have to add it then to your own component.
-
Each ReportView has its own status bar, so if you have multiple report views, you'll need to extract each individual status bar.
Replacing the Status Bar with your own Component
Problem
You'd like to completely remove the default status bar and instead display your own status bar component in its place.
Solution
// Now we create a new status bar component
JPanel ourStatusBar = new JPanel();
ourStatusBar.setBackground( new Color(0.7f,0.4f,0.4f) );
ourStatusBar.add( new JLabel("My very own status bar!") );

// Here we replace the status bar with our own component.
reportView.replaceStatusBar( ourStatusBar );
Notes
-
All we are doing here is replacing the GUI components, our own component will not be getting any special events about the status. To get status events, you must add a state change listener to the viewer. See chapter "Monitoring Processes" for an example of how to do this.
-
If all we want is to remove the status bar, it's better to use extractStatusBar instead of replaceStatusBar.
Customizing the Tool Bar
Accessing the Tool Bar
Problem
You'd like to access the Viewer's JToolBar object.
Solution
ToolBar toolBar = viewer.getToolBar();
Component c = toolBar.getComponent();
// With the Swing Viewer, this is a JToolBar:
JToolBar t = (JToolBar)c;
Notes
-
Once you have the actual JToolBar object, Swing's JToolBar API can be used to customize the tool bar as necessary. A few examples follow.
Adding a Button to the Tool Bar
Problem
You have a custom action which you'd like represented in the tool bar by a tool bar button.
Solution
ToolBar toolbar = viewer.getToolBar();
JToolBar t = (JToolBar)(toolbar.getComponent());
Action a = new AbstractAction("myAction",
  new ImageIcon("myAction.gif")) {
    public void actionPerformed( ActionEvent e ) {
        // Your action goes here...
    }
};
t.add( a );
Notes
-
All that is needed for this once we have a JToolBar object is to simply utilize Swing's JToolBar API.
Removing Buttons from the Tool Bar
Problem
You'd like to remove the info button from the Tool Bar, also you don't want F1 to open an info dialog either.
Solution
// remove info button
toolBar.setButtonsVisible( ToolBar.BUTTON_INFO, false );
// disable info action in the ActionPool of the Viewer
viewer.getActionPool().getViewerAction( ActionPool.INFO )
                                         .setEnabled( false );
Notes
-
Only removing the button would not remove the action, so F1 would still open an info dialog.
-
Only disabling the action would not remove the tool bar button, rather it would grey the button out.
-
If you'd like to set button visibility or change action enabledness of any other action than the info action, you can simply utilize the constants provided in ToolBar and ActionPool.
Customizing Button Actions
Problem
You'd like to actually change the behavior of a tool bar button, for example the refresh button.
Solution
// remove the original refresh button
toolBar.setButtonsVisible( ToolBar.BUTTON_REFRESH, false );
// disable the original refresh action (F5)
viewer.getActionPool().getViewerAction( ActionPool.REFRESH ).
  setEnabled( false );
// Now create your own refresh action:
Action refresh = new AbstractAction("myRefresh",
  new ImageIcon("refresh.gif")) {
    public void actionPerformed( ActionEvent e ) {
        // Your custom action goes here...
        if (myApp.isReadyForRefresh()) {
            viewer.getCurrentReportView().refresh();
        } else {
            // Whatever you'd like to do here...
        }
    }
};
// ...and add your action to the tool bar.
t.add( refresh );
Notes
-
All that is done here is simply removing the button we wish to replace, and adding a new one in its place with a different action.
-
If we'd like to customize the action for exporting, printing, and showing the info dialog, the best and easiest way, rather than replacing the button, is to create a custom ViewerContext and set it for the viewer (see chapter "Customizing Error Handling" or Customizing the Info Dialog" for examples on how to do this).
Disabling the Group Tree
Problem
You have a report which has groups, but you don't want to display its group tree, which by default would cause the ReportView to become a split pane with the group tree on the left and the actual report on the right.
Solution A
viewer.setHasGroupTree(false);
Solution B
reportView.setHasGroupTree(false);
Notes
-
Solution A disables showing any group trees for the entire viewer. This means that if you are showing multiple report views, this will disable showing group trees for any of them.
-
Solution B instead only disables showing group trees for the individual view on which the method was called.
-
Note that calling setHasGroupTree(true) only enables showing a group tree if the report has groups to begin with.
Logging
Problem
Instead of the Viewer logging to the console as it does by default, you'd like the Viewer to log to a log file.
Solution
File f = new File("C:/viewerlog.txt");
// Here we now choose to change the logging output of the viewer:
try {
    SwingReportViewer.setLoggingStream( new PrintStream( new FileOutputStream( f ) ) );
} catch( FileNotFoundException e1 ) {
    e1.printStackTrace();
}
Notes
-
Since Java VM 1.5, you can shorten this by creating a PrintStream with a File directly rather than creating a FileOutputStream: viewer.setLogStream( new PrintStream(f))
-
This code for the logging should be at the beginning of the code
-
If you'd like to disable the logging, simply pass null to the method.
Monitoring Processes (Exporting / Printing)
Problem
You'd like to monitor any exporting and printing processes started by the user. If a user has successfully printed the report once, you'd like to disable printing after this so that the user does not print the report more than once. You'd like the same behavior when a user exports successfully.
Solution
public class ViewerStart implements PropertyChangeListener {
    //...

    public void initGUI(){
    //...

    // We now register ourselves as a propertyChangeListener
    // with the viewer so we can keep track of any changes in
    // progresses
    viewer.addStateChangeListener(  (PropertyChangeListener) this );

    // ...
    }
    //...
    public void propertyChange( PropertyChangeEvent evt ) {
        if (evt.getSource() instanceof Progress) {
            // If a progress has changed...
            Progress p = (Progress)evt.getSource();
            if (p.getType() == Progress.TYPE_EXPORT ||
              p.getType() == Progress.TYPE_PRINT) {
                // ...and it is an export or print progress
                if (evt.getPropertyName().equals(
                  Progress.PROP_PROGRESS_STATUS )) {
                    // ...and its status has changed...
                    int status = ((Integer)evt.getNewValue())
                                                      .intValue();
                    if (status == Progress.STATUS_COMPLETED) {
                        // ... and the progress has successfully
                        // been completed, then disable any
                        // further export or printing,
                        // depending on what just happened.
                        if (p.getType() == Progress.TYPE_EXPORT) {
                           viewer.getActionPool().getViewerAction(
                             ActionPool.EXPORT ).setEnabled(false);
                        } else {
                           viewer.getActionPool().getViewerAction(
                             ActionPool.PRINT ).setEnabled(false);
                        }
                    }
                }
            }
        }
    }
}
Notes
-
If a PropertyChangeEvent is fired for a com.inet.viewer.Progress, the Progress itself is the source.
-
Both exporting and printing are accomplished through Progresses, and have their own constants for the type of Progress. See the constants in Progress for the other types of Progresses there are.
-
There are various progress properties which are sent via PropertyChangeEvents, not only status changes. See the PROP_ constants in Progress for the other properties which may change, such as the current progress step, and others.
Printing From a ReportView
With a Print Dialog
Problem
You'd like to print a report without showing the report in the ReportViewer. You just want to show a print dialog to the start printing.
Solution
// ...
ReportView reportView = viewer.createReportView(
  new URLRenderData("http://localhost:9000/?report=file:sample.rpt");
reportView.print(1,-1,true);
// ...
Notes
-
If you don't want a preview, you don't need one! This will simply create a ReportView and then print it using a print dialog.
-
Note the parameters you can pass in the print method: The first parameter is which page to start printing from, the second is the page number to print up to (or -1 to print all pages), and the last is whether or not to show a print dialog.
Without a Print Dialog
Problem
You'd like to print a report without showing the report in the ReportViewer. You just want to print the report without any dialog popping up, including the print dialog.
Solution
// ...
ReportView reportView = viewer.createReportView(
  new URLRenderData("http://localhost:9000/?report=file:sample.rpt");
reportView.print( 1,  -1, false);
// ...
Notes
-
If you don't want a preview in the ReportViewer, you don't need one! This will simply create a ReportView and then print it, but the ReportView will never be displayed on screen, nor will the print dialog show up.
-
Note the parameters you can pass in the print method: The first parameter is which page to start printing from, the second is the page number to print up to (or -1 to print all pages), and the last is whether or not to show a print dialog.
Printing with your own PrinterJob without a ReportView
Problem
You have a connection to a server with a RenderData instance and would simply like to print without using the class ReportView .
Solution
RenderData data = new
  URLRenderData("http://localhost:9000/?report=file:sample.rpt");
PrinterJob job = PrinterJob.getPrinterJob();
// .... modify PrinterJob if needed. for example the printer
HashPrintRequestAttributeSet attributeSet =
  new HashPrintRequestAttributeSet();
// ... change some attributes if needed, for example paper
// size and margins
PrinterJobProgress progress = new PrinterJobProgress( null, job,
  attributeSet, data );
progress.startProgress();
// .. control progress of the process if needed
Notes
-
Once you have the progress, you can fetch additional information about the process, such as whether is finished and other information.
Retrieving the PrintRequestAttributes of a Report
Problem
You'd like to print yourself, but you require information about the report in form of PrintRequestAttributes which include page format, page number, page margin and page orientation information
Solution
HashPrintRequestAttributeSet attributeSet = reportView.getDefaultAttributeSet(1, -1);
Notes
-
You need a instance of Report View for this example.
-
First parameter is the starting page, the second is the ending page. See chapter Printing From a ReportView.
Customizing the Initial Values of the Print Dialog
Problem
You want to make use of the print dialog, but would like to customize the initial values displayed in the print dialog.
Solution
public class MyViewerContext extends SwingViewerContext {

  public void print(ReportView reportView) {
    HashPrintRequestAttributeSet attributeSet = reportView.
      getDefaultAttributeSet( 1, -1 );
    // ... set your customized Attributes here ...
    // For example to set the Orientation to Landscape
    attributeSet.add(  OrientationRequested.LANDSCAPE  );
    PrinterJob job = PrinterJob.getPrinterJob();
    SwingReportView.showPrintDialog( null, job, attributeSet );
    // ... set enforced AttributeSet here, if needed
    reportView.print( job, attributeSet );
  }
}
Notes
-
We implement our own print method and provide it via our own ViewerContext.
-
There are two spots to customize printing attributes. The first before the print dialog is shown to give default values. Secondly after the print dialog to enforce (overwrite) user settings.
-
A Component can be provided as the first parameter in the showPrintDialog method if you want the dialog to be modal.
Printing Multiple Reports in a Single PrinterJob
Problem
You'd like to print more than one report in a single PrinterJob. For example, your printer might automatically add cover pages to each print job, and you'd like to print 2 reports with only 1 cover page.
Solution
public class MyPrintable implements Printable {
  /** The current Printable */
  private Printable            currentPrintable;

  /** List of all sub Printable */
  private ArrayList<Printable> progressList = new
    ArrayList<Printable>();

  /** Index of the next Printable */
  private int                  idx;

  /** Page offset of the current Printable */
  private int                  pageOffset;
  /**
   * {@inheritDoc}
   */
  public int print( Graphics graphics, PageFormat pageFormat,
				   int pageIndex ) throws PrinterException {
    if( currentPrintable == null ) {
      // No Printable was added
      return NO_SUCH_PAGE;
    }
    int pageStatus = currentPrintable.print( graphics,
					  pageFormat, pageIndex - pageOffset );
    if( pageStatus == NO_SUCH_PAGE ) {
      // the current Printable has no more pages
      currentPrintable = nextPrintable();
      if( currentPrintable == null ) {
        // no more Printable
        return NO_SUCH_PAGE;
      }
      // set the page offset and repeat the printing with
      // the current page
      // every sub Printable start with page offset 0
      pageOffset = pageIndex;
      return currentPrintable.print( graphics, 	pageFormat, 0 );
    }
    return PAGE_EXISTS;
  }
  /**
   * Add a Printable to this super Printable.
   * @param printable a sub Printable
   */
  public void addPrintable( Printable printable ) {
    progressList.add( printable );
    if( currentPrintable == null ) {
      currentPrintable = printable;
      idx++;
    }
  }

  /**
   * Request the next Printable
   * @return a Printable or null
   */
  private Printable nextPrintable() {
    if( idx < progressList.size() ) {
      return progressList.get( idx++ );
    }
    return null;
  }
}
PrinterJob job = PrinterJob.getPrinterJob();
HashPrintRequestAttributeSet attributeSet = new
	HashPrintRequestAttributeSet();
MyPrintable myPrint = new MyPrintable();

// Create the needed PrinterJobProgress instances
// with the RenderData
PrinterJobProgress pjp1 = new PrinterJobProgress(....);
pjp1.setStatus( Progress.STATUS_COMPLETED );
myPrint.addPrintable( pjp1 );

job.setPrintable( myPrint );
job.print(attributeSet);
Notes
-
We implement our own Printable and simply run through the PrinterJobs we want to print in the single print method.
-
In order to have PrinterJobProgresses, these would somehow have to be passed to our MyPrintable. How you do this is of course up to you.
Specifying Custom Prompt Editors for Specific Prompts
Problem
You'd like to customize the way a certain prompt is requested of the user, and have your own custom component to do so.
Solution
public class MyCustomPromptEditor implements CustomPromptEditor {

  // any component will do fine here
  private JTextField myTextField;

  public MyCustomPromptEditor() {
      myTextField = new JTextField();
      // customize as needed (e.g. your own Renderer,
      // your own Model, your own event handling, etc.)
  }

  public Object getValue() {
      return myTextField.getText();
  }
  public void setValue( Object value ) {
      myTextField.setText( value.toString() );
  }
  public Component getComponent() {
      return myTextField;
  }
}
// ...
MyCustomPromptEditor myEditor = new MyCustomPromptEditor();
viewer.setCustomPromptEditor( "specialPrompt", PromptData.STRING, myEditor );
// ...
Notes
-
This causes the prompt with the name "specialPrompt" to be prompted using our own customized component – this name is checked case-insensitively.
-
The value that must be returned by CustomPromptEditor.getValue() needs to be an instance of the class corresponding to the prompt types. See the Javadoc of CustomPromptEditor.getValue for a list of what to return.
Advanced Examples
Showing Reports in Individual Windows
Problem
You'd like to use one viewer to show multiple reports. However, instead of having a central viewer with a tab pane of reports, you'd like each report opened to have its own frame rather than tab.
Solution
(See samples.viewer.Viewer_With_Multiple_Frames.java for full source)
...
    viewer = new SwingReportViewer() {

       // Here we will override the default behavior of the Viewer.
       // For this, we'll keep track of the Views in a HashMap:

       HashMap myMap = new HashMap();
       public void addReportView(ReportView view,
                                     boolean isClosable)                	 {

           // We now override the default behavior of
           // addReportView which used to open new tabs
           // for each new view.
           // Instead, we open a new frame, place the new
           // report view inside it, and remember it in
           // combination with the frame in our hash map.

           JFrame repFrame = new JFrame(view.getReportData().
                                                getReportTitle());

           // So that the viewer knows which ReportView is the
           // current report view (for toolbar actions, etc.),
           // we'll define a WindowFocusListener so that
           // whenever a user focuses on a report view window,
           // it becomes the current report view.

           WindowFocusListener l = new WindowFocusListener() {
               public void windowGainedFocus(WindowEvent e) {
                   setCurrentReportView(
                            (ReportView)myMap.get(e.getWindow()) );
               }
               public void windowLostFocus(WindowEvent e) {
               }
           };
           myMap.put(repFrame,view);

           // Now we simply add the view to the frame and show it:

           repFrame.addWindowFocusListener(l);
           repFrame.getContentPane().add(view.getComponent());
           repFrame.setDefaultCloseOperation(JFrame.EXIT_ON_CLOSE);
           repFrame.pack();
           repFrame.setVisible(true);
           setCurrentReportView(view);
       }

   };
   // The next two lines assume we have a report server running on
   // localhost. Naturally, we could use any report server name
   // here instead.
   viewer.addNewReportView( new URLRenderData(
                 "http://localhost:9000/?report=file:rdc/complex.rpt") );
        viewer.addNewReportView( new URLRenderData(
                 "http://localhost:9000/?report=file:sample.rpt") );
        viewer.setPreferredSize( new Dimension(725,35) );
...
Notes
-
The method we override is called indirectly when we call addNewReportView. It is called whenever a new report view is added to the viewer.
-
Note that the tool bar remains central, but knows which report view to address with actions since we call setCurrentReportView when necessary.
Creating a Bookmark View & Adding Keyboard Shortcuts
Problem
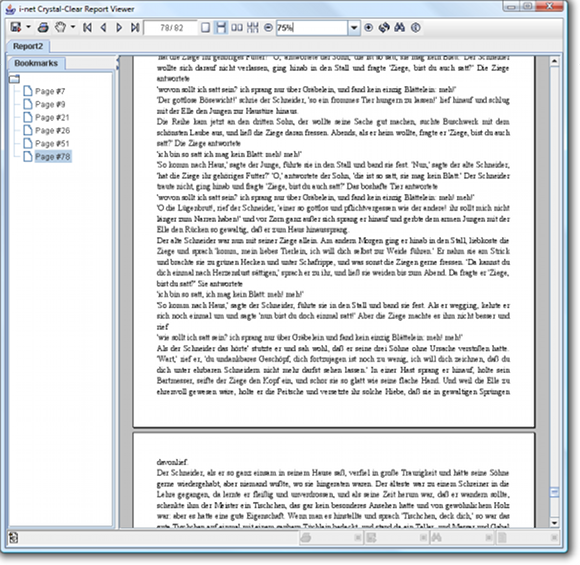
In the navigation view on the left hand side of the report, you'd like a bookmark view where users can click on a bookmark, causing the report to jump to the bookmarked page in the report. As well, you want a user to be able to add his own bookmarks at any time by pressing Ctrl+D on the page they'd like to bookmark.
Solution
(See samples.viewer.bookmark.BookmarkView.java for full source)
public class BookmarkView extends JPanel implements NavigationTab {
...
    public void addBookmark(String name, int page) {
        Bookmark bookmark = new Bookmark(name,page);
        addIfNecessary(bookmark);
        bookmarkTree.expandRow( 0 );
    }
}
(See sample.viewer.Viewer_With_Bookmarks.java for full source)
...
    view = viewer.addNewReportView( data );
    bookmarkView = new BookmarkView(view);

    NavigationView navView = view.getNavigationView();

    // Adding the bookmark view
    navView.addNavigationTab( BookmarkView.TITLE, bookmarkView );
    // Making sure the navigation view is shown.
    navView.setVisible( true );
...
Notes
-
Creating your own sidebar tab is as simple as impementing the NavigationTab interface and adding it to the NavigationView.
-
It is necessary to call "setVisible(true)" on the NavigationView if the report has no group tree, since otherwise by default, the NavigationView will be hidden.
-
Creating your own keyboard shortcuts for the Viewer should be done as shown: By utilizing the Viewer's input map and action map.
Tunneling Viewer Requests to your own Server via RPC
Problem
You have a client application which is communicating with your server application via RPC (such as CORBA, RMI, etc.). You'd like to have a viewer client that communicates with the report server back-end on your server. For this you need an instance of RenderData.
Solution
-
Write an implementation of RenderData for the client which does nothing other than tunnel the requests to your server. With CORBA, the creation of this implementation can be done automatically by defining an interface via IDL and using Java's idlj tool to generate the code. Here's an example IDL file for a simplified RenderData interface:
module renderdata
{
  typedef sequence<octet> byteArray;
  interface CORBARenderData
  {
    byteArray getPageData( in long page );
    long getPageCount();
    byteArray getNextExportChunk();
    long getExportChunkCount();
    byteArray getGroupTree();
    byteArray refreshPageData(in long page);
    void setReportProperty(in string key, in string value);
    void setExportProperty(in string key, in string value);
    string getReportProperty(in string key);
    void setPromptOnRefresh(in boolean promptOnRefresh);
    boolean isPromptOnRefresh();
    void stop();
    byteArray search(in string phrase, in long startPage,
                       in long flags);
    byteArray getFontData( in long fontID );
  };
};
-
In your server application, pass any incoming RenderData requests on to an instance of EngineRenderData which resides on your server. Then tunnel any results from these calls back to your client.
-
See sample.viewer.corba.ViewerViaCORBA.java for an example of a Viewer CORBA client, and sample.viewer.corba.CORBARenderDataServer for an example of a CORBA server which takes requests and passes them on to an EngineRenderData instance.
Notes
-
Remember that EngineRenderData is connected with a report server backend and thereby requires reporting.jar as well as the other .jar files in your i-net Clear Reports installation folder.
Rendering a Report with Locale Data
Problem
You have local data, for example in a JTable, on your client, and would like to use this data to display a report.
Solution A – Render Remotely
-
Send the data to your server and use one of the Engine.setData methods to set your data.
-
Use a URLRenderData or a RenderData implementation as described in chapter Tunneling Viewer Requests to your own Server via RPC to connect to the server and render a report using the data set.
Solution B – Render Locally
-
Include reporting.jar as well as the other .jar files from your i-net Clear Reports installation with your client, and use one of the Engine.setData methods to set the data.
-
Use an EngineRenderData instance as described in chapter Creating a Viewer With Local Report Rendering to have the report be rendered on the client itself. Note that this requires a standalone license. This solution will make your "client" a lot less lightweight than it would with Solution A.
Notes
-
Both methods have their advantages. Choose the solution that fits best your situation and your application structure.
© Copyright 1996 - 2026, i-net software GmbH; All rights Reserved. Imprint
![]()